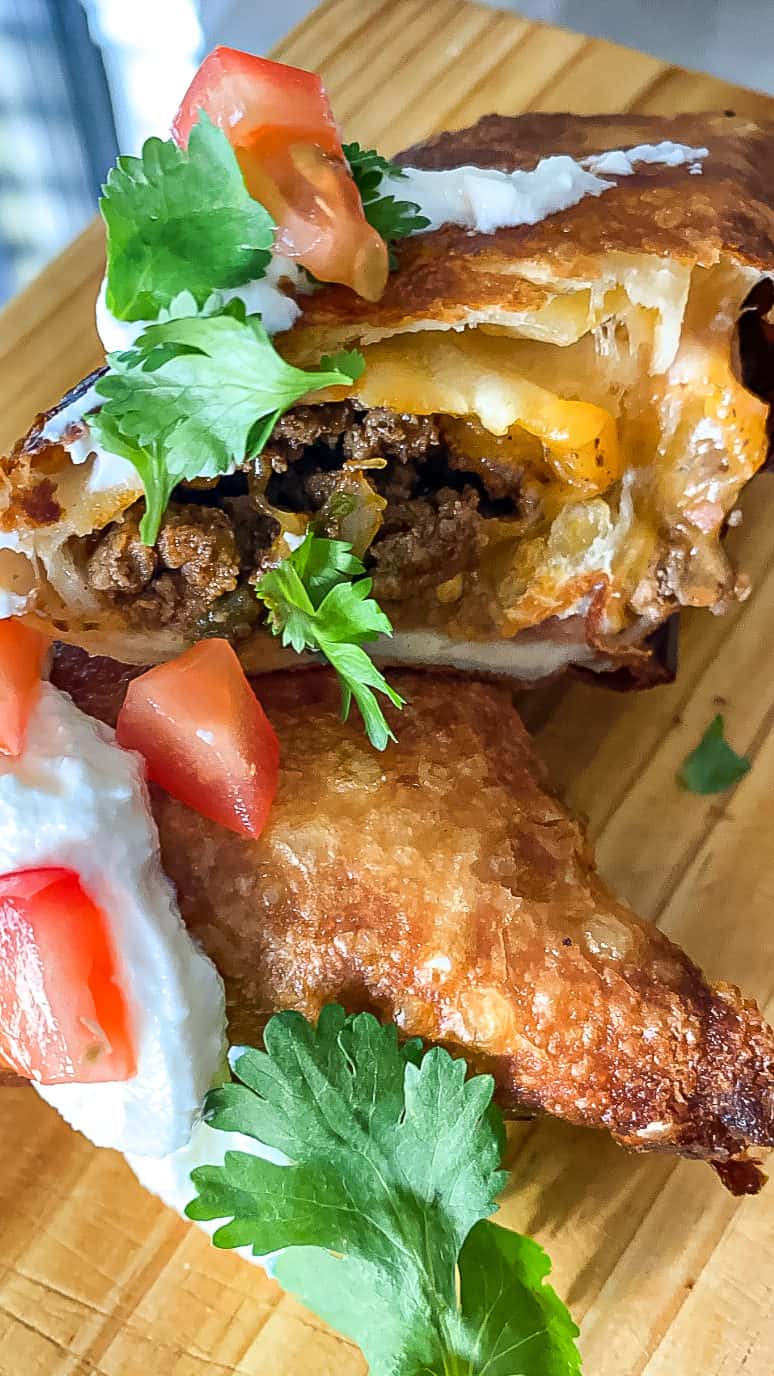
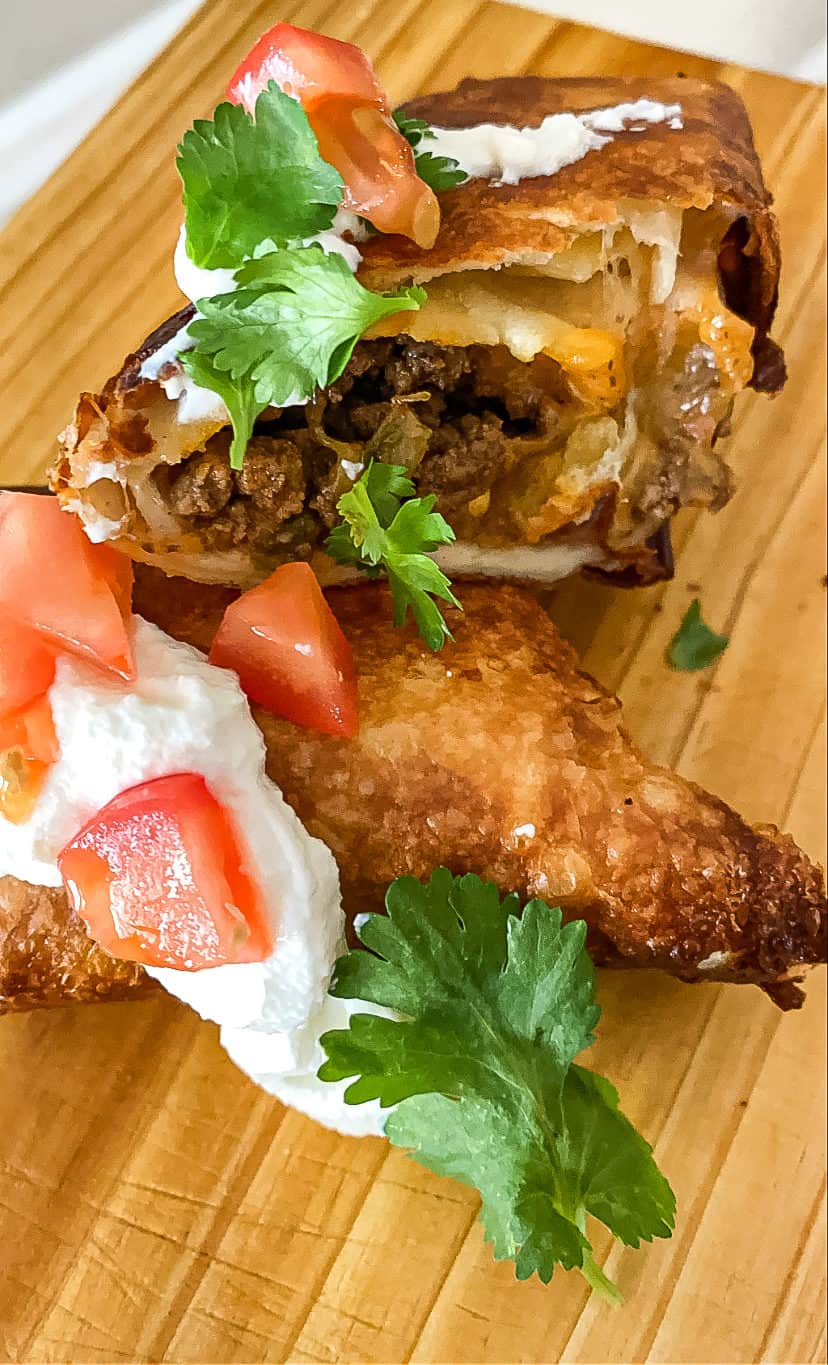
Beef and Cheese Chimichanga Recipe
Beef and cheese chimichangas are large tortillas filled with savory beef, beans, and cheese, then fried to a golden perfection. The perfect quick and easy dinner solution, and even great to make ahead and freeze.
While you are here, you gotta check out these Cheesy Bacon Loaded Breakfast Burritos. Also, be sure to drizzle them with some of this Creamy Jalapeno Salsa, or this amazing Chipotle Salsa.

After living in Texas for such a great period of my life, I was privy to some of the greatest Mexican and Tex-mex food that this nation has to offer! Having lived in so many different states in the USA, I can definitely stand behind that statement too.
It is only right that I learned how to recreate some of my favorite dishes at home. These are up there with my top five favorite dishes.
What is a chimichanga?
A chimichanga is a large tortillas, stuffed with various proteins and starches, and deep fried until they are golden brown. You will usually find them in the “Tex-mex” style dishes versus traditional Mexican food dishes.
What is the difference between a burrito and a chimichanga?
In essence, both of these are made the same. Use a large tortilla, and roll different fillings inside of it. The biggest difference however, is that the chimichanga is fried! Even more, often times a burrito will be served wrapped in foil or parchment paper, and eaten by hand.
Since the chimichangas are deep fried, they are often served on a platter, and topped with various sauces or chilis. This makes it necessary to eat them with a fork and knife versus picking them up and eating them with your hands.
Check out the story below for recipe details:
Ideas for the filling:
Most of the time you will find some sort of protein, and starch, along with a cheese of some sort. Protein ideas include ground beef (like this recipe calls for), shredded or diced chicken, fajita meat, or make it vegetarian by substituting all vegetables.

How to make a vegetarian chimichanga:
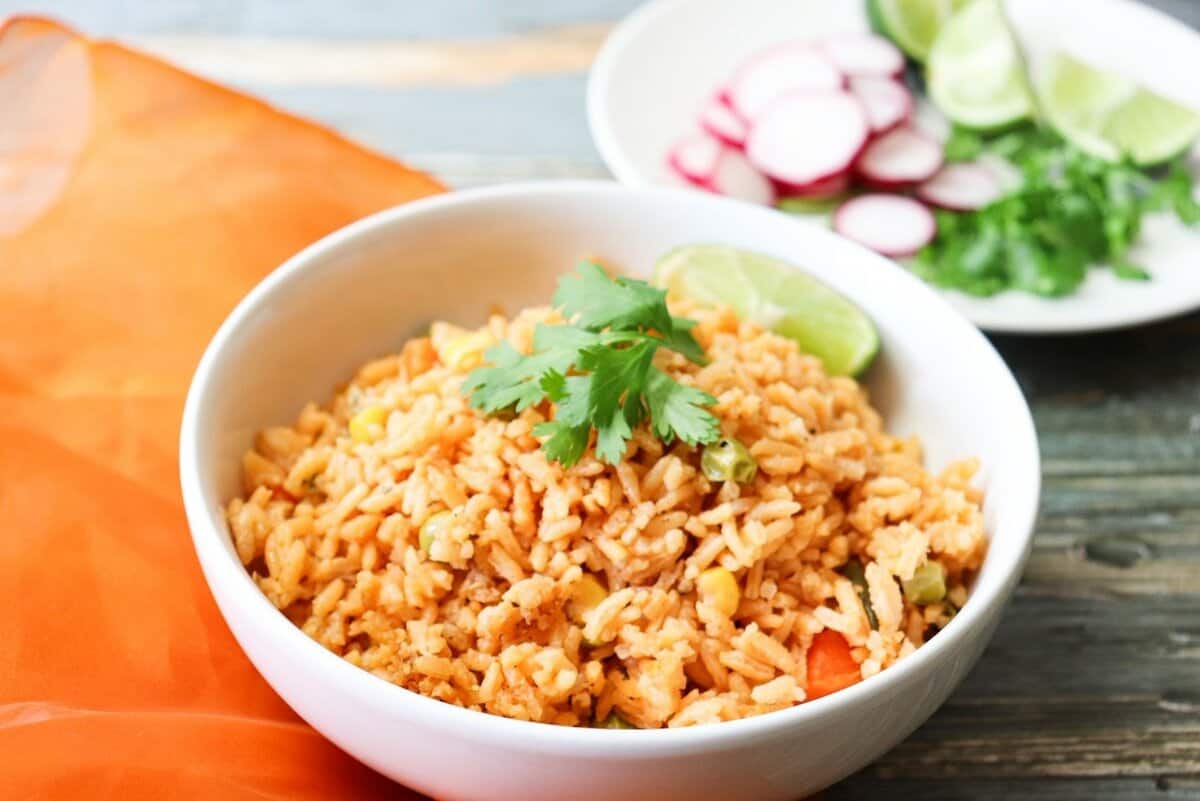
There are so many options to make these “meatless.” Instead of adding beef, you can simply add rice and beans. Pinto beans, black beans, or any other type of bean that you prefer. This Mexican Rice is also a super delicious addition.
Chop-up some bell peppers and onions, maybe even some mushrooms, and add them as a filling as well. Top the “meatless” mixture with some cheese, and roll them up as directed. Next, you can fry them until they are perfectly golden!
How to store the chimichangas:
If you are interested in making them ahead of time and freezing, follow the instructions all the way up until the deep frying part. Simply fill the tortillas, roll them, and instead of frying, wrap them with aluminum foil. Wrap them as tight as possible, label them, and place them in a freezer safe gallon bag.
When you are ready to them- remove as many as you desire from the freezer, and gently place them in oil that is preheated to 375 degrees. You can fry them from frozen, but be extra careful not to burn yourself with popping oil from the ice crystals.
Fry each side for seven to ten minutes, flip them over and fry an additional seven to ten minutes. Cooking times may vary based on the temperature of the oil. The most important thing is to make sure the inside is thoroughly heated.

Making them in the oven or air fryer:
If you want to avoid deep frying the burritos, baking them is another option. Trust me when I say, frying them in oil does taste better! For a healthier option though, baking them is the way to go.
Follow all of the instructions up until the deep frying part. Instead of frying them, you should place them on a non-stick baking sheet, or in the air fryer, seam side down. Spray them with a canola oil spray (spray them liberally, and directly over the top).
Bake them on 350 degrees for ten minutes, flip them over, and bake an additional seven to ten minutes. Once the chimichangas are golden brown- remove them from the oven or air fryer.
What to serve with the chimichangas:
If you want to keep it traditional (like dining out at a Mexican restaurant), serve them with a nice helping of rice and beans! Another great side or even topping, would be some homemade guacamole, or a quick and delicious pico de gallo.
Beef and Cheese Chimichanga Recipe
Ingredients
- 6 large Flour tortillas
- 1 pound Ground beef
- 1 cup Water, to add to cooked and seasoned beef
- 2 cups Cheese, shredded
- 1 can Refried pinto beans
- 2 cups Vegetable oil, to fry chimichangas
Seasoning for ground beef
- 1 tablespoon Chili powder
- 1/2 tablespoon Seasoned salt
- 1/2 tablespoon Ground cumin
- 1 teaspoon Black pepper
- 1 teaspoon Garlic salt, or garlic powder
- 1/2 teaspoon dried Oregano
- 1/2-1 cup Water
Topping Ideas
- Sour cream
- Shredded lettuce
- Salsa
- Chopped tomatoes
Instructions
- Brown the ground beef in a skillet over medium heat. The meat is fully cooked when there is no longer any pink visible. Use a strainer to drain any excess grease from the skillet.
- Put the meat back into the skillet over medium heat. Add all of the seasonings, and water and mix it together thoroughly. Continue to simmer until the water is absorbed.
- Heat the vegetable oil in a separate skillet over medium heat. While the oil is heating up, begin assembling the burritos.
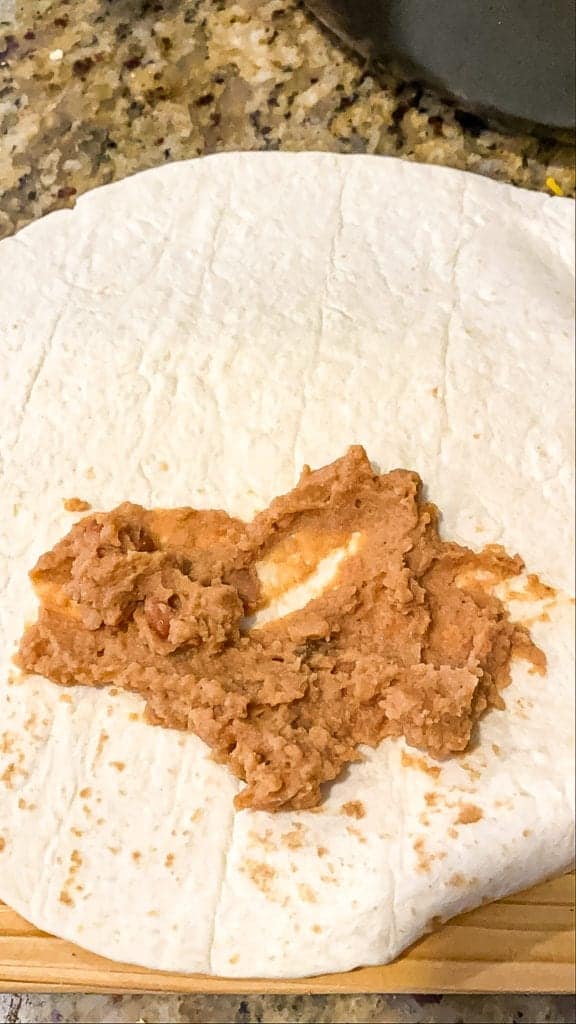
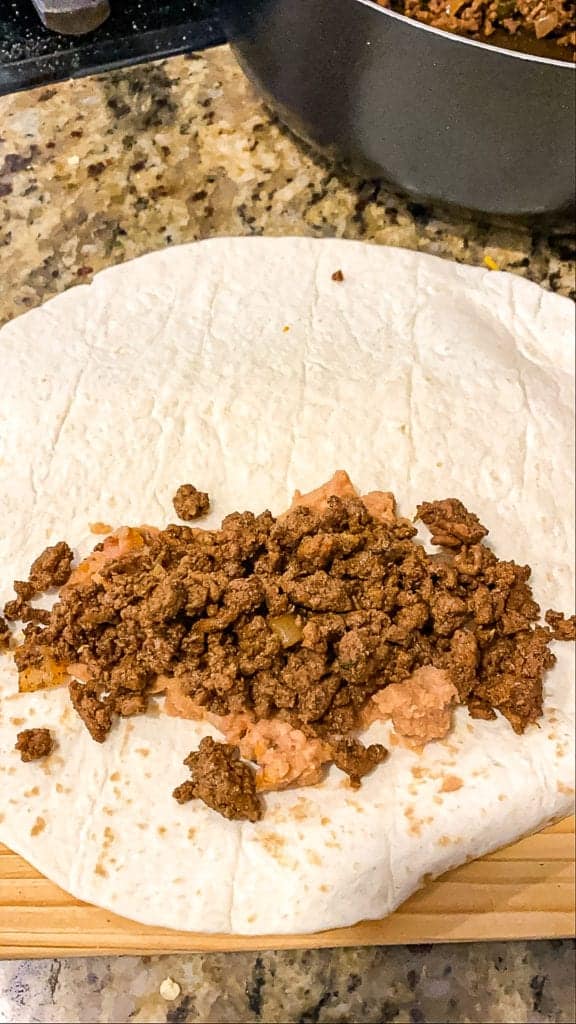
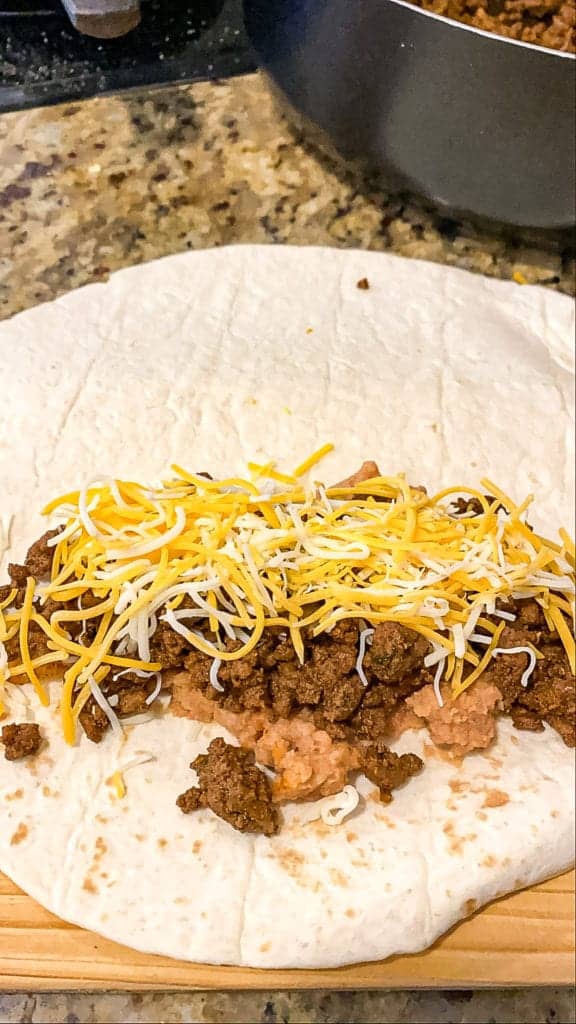
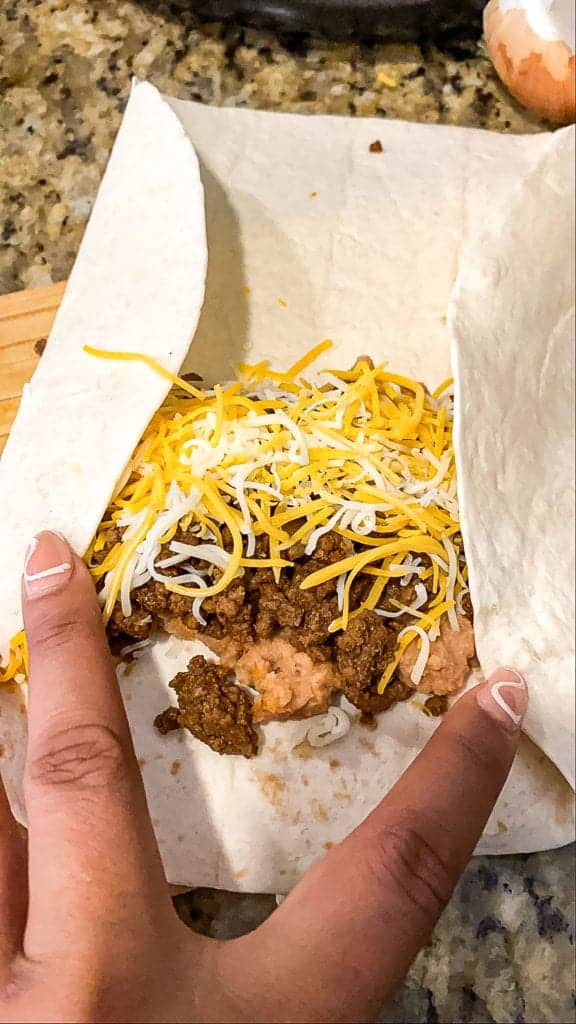
- Place about one tablespoon of beans on one side of the tortilla and smear it across, somewhat close to the edge. Next place one to two tablespoons of the meat mixture, then a sprinkle of cheese (a generous sprinkle)!
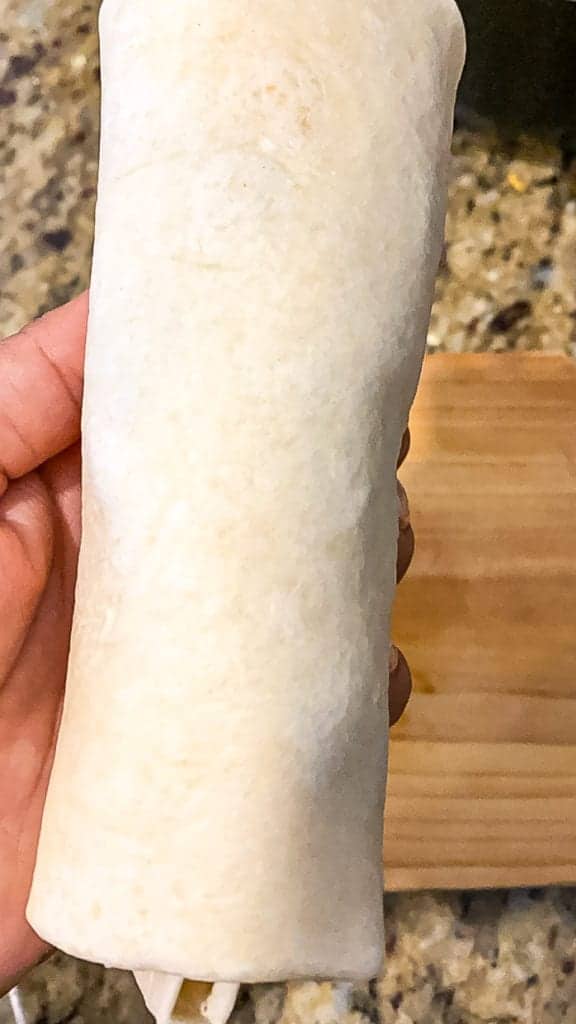
- Begin to roll the tortilla up over the mixture, once half way rolled, fold in the sides towards the middle, then continue rolling all the way until it is closed. Roll as tight as possible so that the mixture does not ooze out.
- Continue rolling until all of the burritos are made or you run out of mixture.
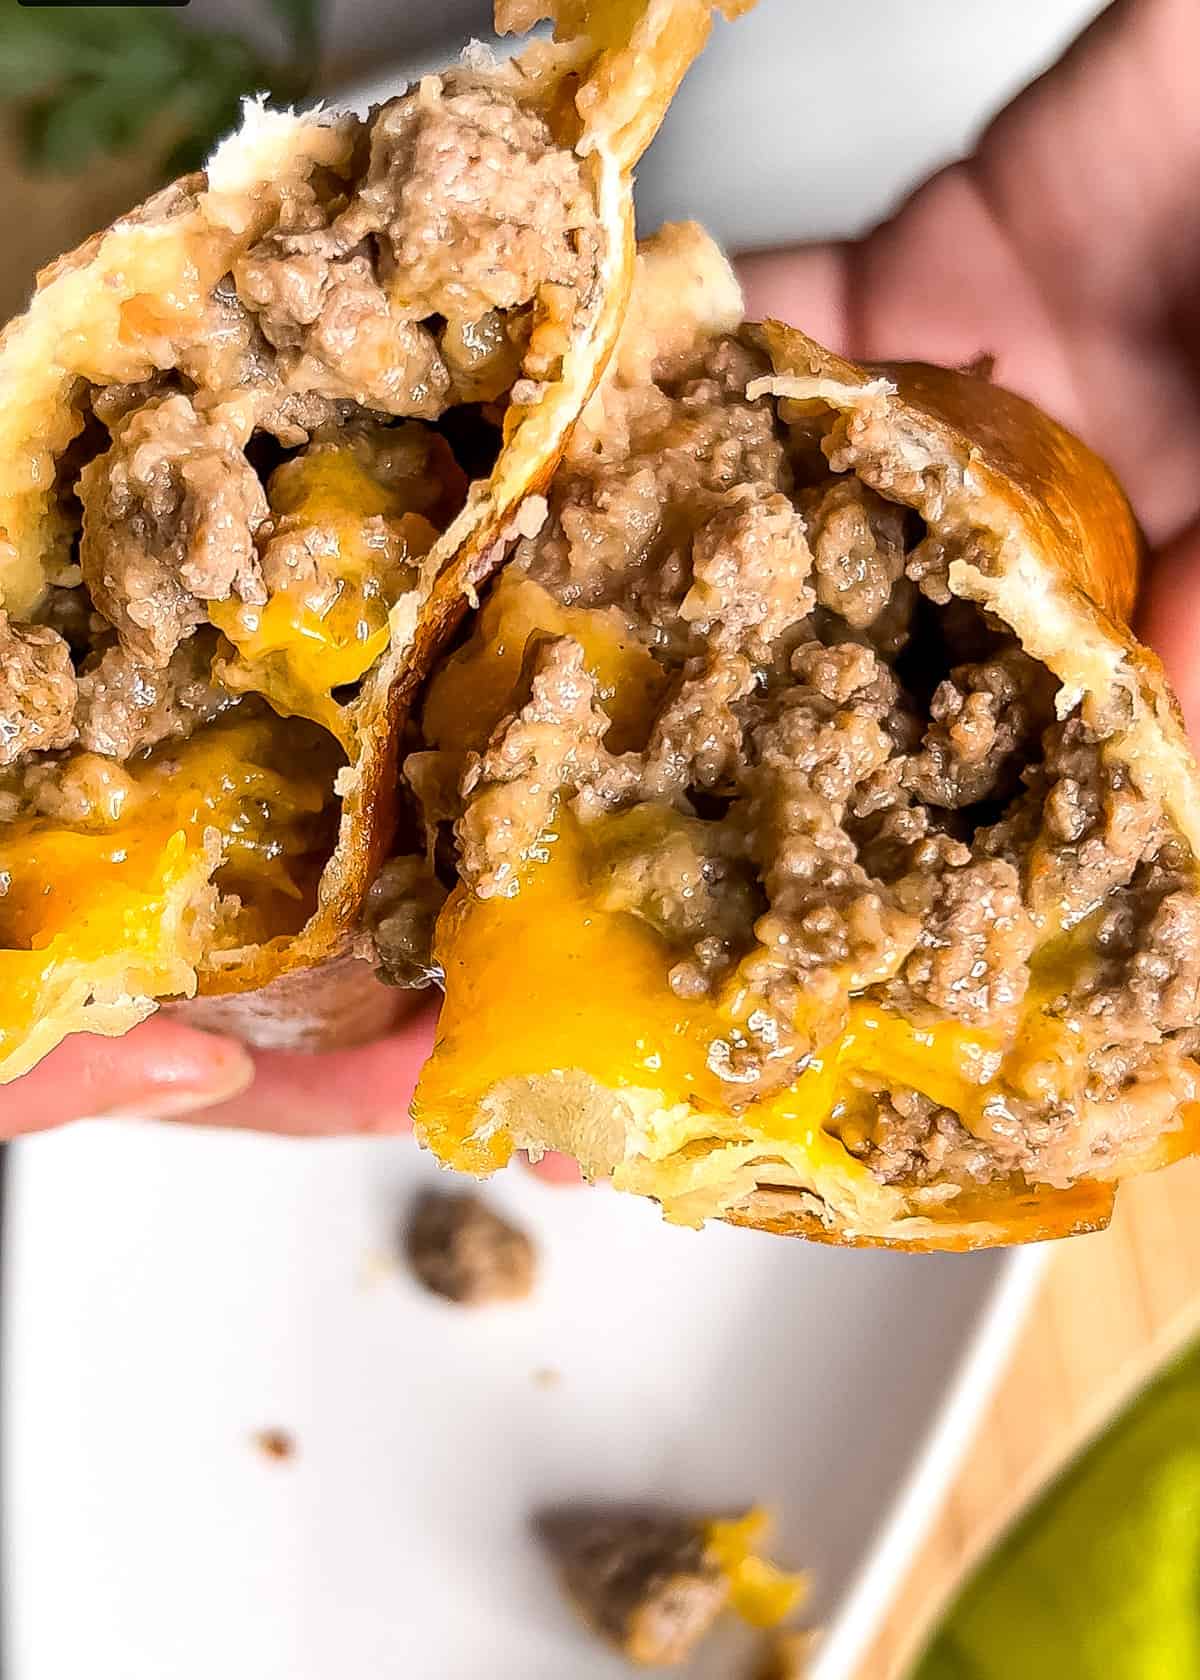
- Place the burritos into the hot oil SEAM SIDE DOWN. Fry on each side for one to two minutes, or until they turn golden brown. Be sure to flip, and fry the sides of the burritos as well,
- Remove from the oil and drain on a baking sheet or a bed of paper towels. Top with your favorite garnishes and salsas. Enjoy!


Wow! This was delicious! I added premade queso on top. I will definitely be making this once a month.
That sounds amazing! I’m happy you enjoyed it!
Amazing
can u cook these chimichangas in the airfryer
Yes you can. I spray mine with a cooking oil on each side so that they crisp up.
Good recipe
Thanks Erica!
Chimichangas are my absolute favorite way to Tex-Mex, and I loved your recipe! I could never get enough courage to make them at home, and now I can. I cannot wait to serve these to a larger crowd. My family devoured them.
I had never attempted chimichangas before and your folding instructions were so helpful!
I had never attempted chimichangas before and your folding instructions were so helpful!
Okay, so these chimichangas are so good!! I’ve already eaten 4 by myself! They are so quick and easy to make! I can’t get enough!
I love chimichangas but I never thought they could be so easy to make til I found this recipe!
This savory chimichangas were delicious and had everyone drooooling! The combination of beef and cheese was perfect.
This was my first time making chimichangas but it will not be my last because this recipe was SO good! I was also shocked at how easy they were to make, we loved this recipe so much!
I grew up eating chimichangas but never knew I could make them in the oven. I have to watch my cholesterol intake, so your tip is a winner.
This was such a simple and yummy recipe!!!! I froze a couple up to fry later as well.
We made and froze these a few weeks ago. The kiddos made them for lunch today and there were excellent! Thanks for sharing.
Awesome! So glad you enjoyed them!
Do you freezE before or after cooking?
You should cook them first, let them cool down completely and then freeze them.